Have you been wondering whether you can learn how to knit? If these thoughts have been on your mind, then you are in the right place, as this page in particular, and this website in general, is all about showing you how to knit step by step, and slowly.
Learn How to Knit Useful Items
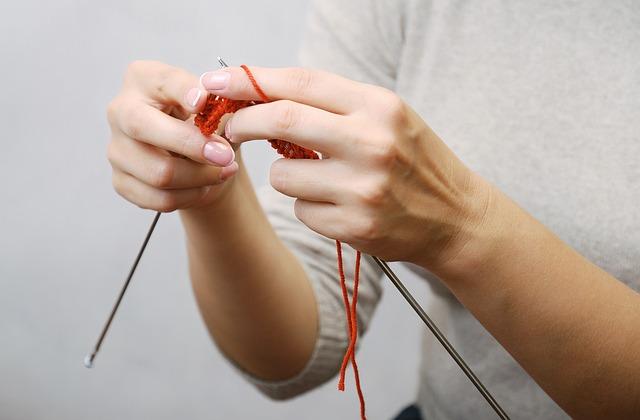
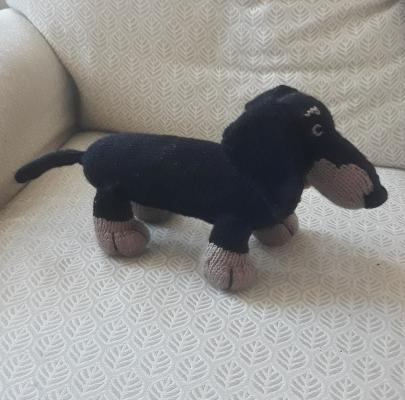
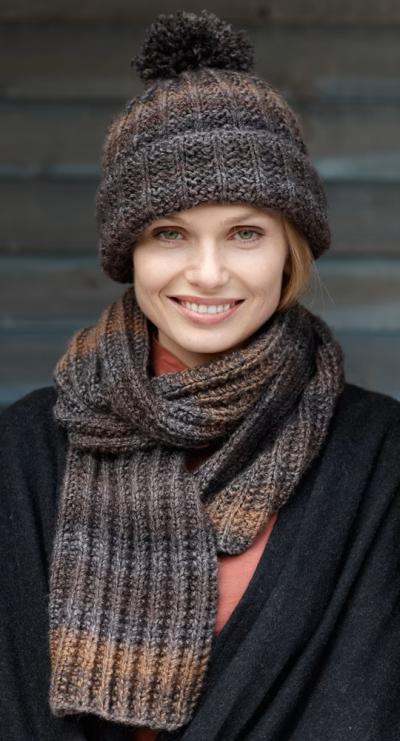
Maybe you have seen someone knitting in a public place such as the GP surgery ( I do that) or while waiting somewhere. This may have inspired you to figure out how to do it yourself. Maybe you have seen the beautiful creations that can be made from knitting, such as handmade scarves, beautiful Aran jerseys and bedspreads crafted from textured knitted squares, or even a unique knitted toy.
Health Benefits of Knitting
Besides creating useful items knitting has many other benefits too. Aside from creatively making things and carrying a project through to completion, it is also a good way to relieve stress. Knitting is meditative, especially when you use simple stitches that become rhythmic, so you can take yourself out of tense, difficult situations and relax.
I get a sense of accomplishment when I have completed the knitted toys I make and given them to my great nephews and nieces.
Learn to Knit Step by Step
As you begin to learn to knit, it can be a bit overwhelming as there are so many choices of yarns to use, patterns to make, and different stitch techniques to master that you wonder if you’ll ever get your head around them all . The key is to take it slowly, and learn step by step, don’t be in a hurry to get ahead of yourself.
Knitting like many other hobbies, takes time, and you’ll need to build some solid foundations first. These won’t take long so be patient. But, even after learning the three basics – casting on, the knit stitch and casting off you’ll be able to make lots of things to practice your new skills.
One key to success is to master one skill correctly by following the instructions carefully, then put them into practice by making a simple project.
Everyone starts as a beginner, be patient, enjoy mastering the techniques and remember it is not a big deal if you make a mistake. You can learn from them too.
So that is enough waffle and preamble, let’s get on with it.
By reading and following the instructions on this page, you will learn
- how to hold the needles,
- how to cast on and off, and
- how to do the knit stitch and the purl stitch.
This will give you the foundational basics, which will then enable you to make several projects.
What You Need to Get Started
When you start learning, you only need a pair of knitting needles and some yarn.
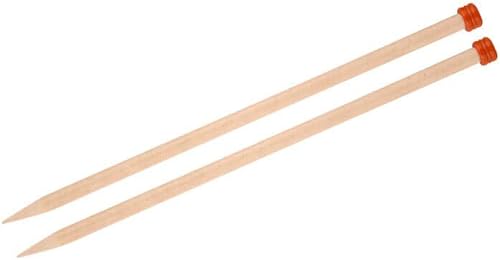
As a beginner, start with a thicker pair of wooden bamboo needles such as 5 or 6 mm and a corresponding thicker yarn like Aran or chunky weight is best.
If you already have yarn and needles lying around at home, and don’t want to invest in thicker ones, you can, of course, use those. I am just recommending the best ones for beginners to use.
Thicker Needles – 5 mm
The reason is that thicker needles and yarn are easier for beginners to hold and cope with and to see the stitches being made. Bamboo or wooden needles tend to have more drag on them which means the stitches you make are less likely to slip off.
I recommend these wood knitting needles for beginners because they are shorter. If your needles are too long then they’ll flap around, irritate you and get in the way.
Aran or Chunky Weight Yarn
Thicker yarns are easier for new knitters to handle than thin, lightweight yarns, which might be fiddly. If you want more information, read this post, which gives more details about the best knitting yarns for beginners.
When you’re just learning, don’t spend your hard-earned cash on an expensive yarn. Instead, choose something cheaper so you don’t put pressure on yourself. A yarn like the one pictured below.

Scissors
You’ll need a pair of scissors, too. Any pair that you already have in your home will do. In time, you may like to invest in a pair that are designed specifically for your knitting projects.
For now, that is all you need to get on with when learning to knit. As you progress you’ll add to your knitting equipment, but it is not worth getting hung up on having all the equipment now.
Ok, so now once you have your needles, and some yarn it’s time to start learning how to use them.
Master the Basic Knitting Techniques
Holding the Needles, Slip Knot and How to Cast on Stitches
The first steps are to learn how to hold your needles, how to make a slip knot that will give you the first stitch on your needle and how to cast on more stitches.
Read my post HERE that has a video tutorial and will cover all three key skills. The post opens in a new tab, which means when you’re done, you can come back to this page for the next step.
Learn to Do the Knit Stitch
Now that you have learned how to hold your needles, make a slip knot and how to cast on additional stitches, it is time to figure out how to do a knit stitch. At first, you’ll feel quite uncomfortable, but just keep doing it slowly again and again, and after a while it will become automatic.
I have dedicated a post to this technique. You can read it here – How to do the Garter Knit stitch pattern The stitch is called the knit stitch and the bumpy ridged pattern you get when you do the knit stitch every row is called garter stitch.
How to Cast Off in Knitting
Next, you’ll need to know how to cast off the stitches on your needles at the end of a project. Find out how to do that by reading this post here ==> How to Cast Off
So, up to this point you have learned the following knitting basic techniques –
- How to hold your needles
- How to make a slip knot which is the first stitch you add to the needle
- How to cast on extra stitches
- How to do the knit stitch and what garter stitch is ( knit every row)
- and finally how to cast off stitches at the end of a project.
How to Do the Purl Stitch
Having learned the knit stitch and what the garter pattern is all about, it is time to discover how to do the next most common knitting stitch, which is called the Purl stitch. I have a separate post on that technique HERE. This link will open in a new window where you can learn how to do it. Once you are done you can return to this page to continue.
Summary of What You’ve Learned So Far
So up to this point you now know how to
- hold your needles
- how to make a slip knot to get that first stitch on the needle
- how to cast on stitches to your needles
- How to do the knit stitch
- What is garter stitch is
- How to cast off the stitches at the end of a project
- How to do the purl stitch
These skills are what I consider to be the foundational knitting techniques, and with the,m you can make many useful and attractive projects.
It’s a good idea once you have mastered these skills to put them into practice by taking on projects that require them.
Simple Knitting Projects For Beginners To Make
Let’s practise those skills you’ve just learned.
I have put together some easy projects for you to try. Click on the links to open the post or visit the websites where you can download these patterns at no cost.
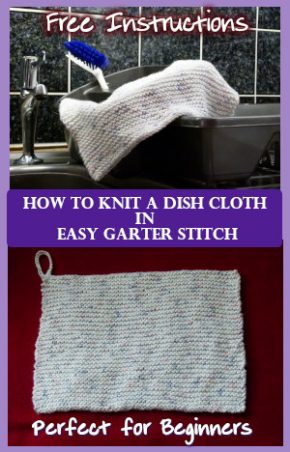
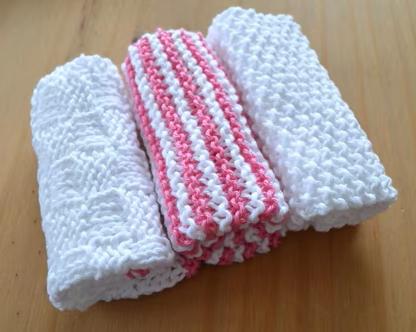
Knit Your First Dishcloth in Easy Garter Stitch – only garter stitch knowledge needed
Ribbed Scarf and Hat in this pattern allows you to practice knits and purls in one row
Easy Knit and Purl Dish Cloth or Bathroom Wash Cloth
Mistakes in Knitting
When you are new to any hobby, there are always issues and mistakes happen, and knitting is no different. Think of your mistakes as a way to learn.
Let’s look at some things that might happen.
Common Mistakes
Dropping Stitches
This is when a stitch comes off the needle and may even start to unravel if it is not dealt with soon enough.
I find that using a crochet hook is the best way to pick up the dropped stitch and place it back onto the needle. If the dropped stitch has unravelled several rows, then I will carefully pull the yarn through each loop until I reach the current row.
Twisted Stitches
Twisted stitches happen when the yarn is wrapped around the needle in the wrong direction or the stitch is worked incorrectly. This happens to me when I have allowed a couple of stitches to slide off the needle (if I put it down quickly to go and attend to something) When I return I notice them and quickly slip them back on. Sometimes they go back on front to back.
To be sitting correctly on the needle, a stitch should have its right-hand leg sitting in front of the needle and the left-hand leg sitting behind the needle.
Make sure that the stitches are not twisted before you knit them. The right leg of the stitch should be in front of the needle. If you’ve already knitted twisted stitches, you can untwist them by working them correctly in the next row. Just slide them off the needle to the other and back on to the first needle with the correct orientation.
Uneven Tension
Uneven tension results in stitches that are too tight or too loose, affecting the overall look and feel of your project. It does not look even over all the stitches.
Practice makes perfect. Try to keep a consistent grip on your yarn and keep the same tension as you knit. Relax and take your time. If your tension varies, blocking your finished piece can help even it out.
Extra or Missing Stitches
Ending up with more or fewer stitches than you started with can distort your pattern and shape.
I find that it pays to get into the habit of counting your stitches regularly to ensure you have the correct number. If you notice an extra stitch, determine where it was added (usually by a yarn over or accidental increase) and either knit two stitches together to remove it or undo the knitting back to the mistake. If you’re missing a stitch, identify where it was lost and pick it up if possible, or undo your knitting back to the mistake.
Tips for Consistency
Maintaining Even Tension:
- Consistency is Key: Try to hold your yarn and needles the same way throughout your project. Find a comfortable position and grip that works for you.
- Practice: The more you knit, the more consistent your tension will become. Don’t be discouraged by early inconsistencies.
Fixing Mistakes:
Rip It Back: Don’t be afraid to undo your work if you make a mistake. It’s better to fix errors as you go rather than continuing with a flawed piece.
Learning to knit takes time and patience. Don’t rush yourself; enjoy the process.
Join a knitting group or online community where you can share your progress, ask questions, and get support from fellow knitters.
By understanding common mistakes and knowing how to fix them, you’ll become a more confident and proficient knitter. Remember, every knitter has faced these challenges, and overcoming them is part of the journey. Keep practising, and soon you’ll be creating beautiful, error-free projects.
Now that you have the foundational knitting skills, it is time to take on a project. If you find there is a technique that you don’t know yet, just visit YouTube, where you’ll be able to find a video that explains the method. Doing projects this way will mean you can increase your skills a bit at a time.
Find a knitting pattern by visiting the PATTERNS category on the main menu of this website.