After coming across so many circular knitting projects , I decided it was time to find out how to knit in the round with circular knitting needles. Not knowing this technique was holding me back on knitting projects that I could tackle. YouTube is full of helpful videos when you want to find out how to do something, so I went searching there to get familiar with this knitting skill.
AFFILIATE DISCLAIMER
Disclosure: This post may contain affiliate links for products recommended. This means that if you click a link and buy something I may receive some compensation, but this is at no cost to you the reader. Thank you for visiting this website.
Fortunately, I had a circular needle to practice with that was given to me by a friend who sadly had to give up knitting. Since then, I have invested in several different sizes from Amazon. They have a good selection of circulars, and they deliver them more often than not, the next day. I am always keen to get started with a project, so I like quick deliveries.
If you want more understanding about circular knitting needles – the benefits of using them, what they are, how they are made up and the various types available – read this post HERE
Casting on with Circular Needles
Casting on with these needles is just the same as for the familiar straight single-pointed needles. Instead of using two separate needles, you will be using the two pins that are joined by the flexible cable. I like to use the cable cast-on method as it is more stretchy and looks neater.
Your pattern will tell you how many stitches you need to cast on. Remember to check your gauge so that your knitting matches as closely as possible with that used in the pattern.
Getting ready to cast on
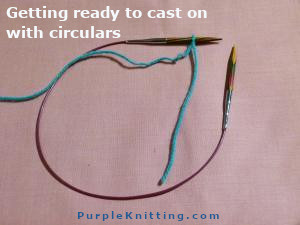
Casting on with circulars – make a slip knot as your first stitch as you normally would with straight single-pointed knitting needles.
Cast on Stitches as Normal
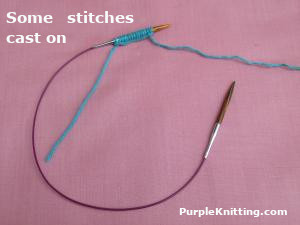
Start casting on stitches as you normally would with straight needles.
Joining in the round
Before you join your knitting to make the circle, you must check that your stitches are not twisted. Make sure that the stitches all sit exactly the same on the needle all the way around. The little bumps at the base of the stitch should all be at the bottom, and facing into the centre of the circle. The video above shows more information about this important step.
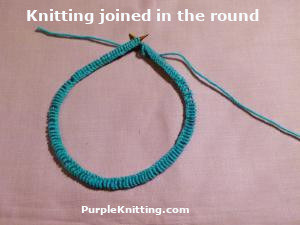
Once you have a neat row of untwisted cast-on stitches, it is time to join your knitting in the round.
Put the needle pin that is attached to the working yarn in your right hand
Push stitches closer to the tip of the needle
Add a stitch marker to the right needle to indicate where the round begins and finishes.
Knit into the first stitch on the left-hand needle ( as you normally would) – pull yarn tight so that you don’t get a gap forming.
Continue knitting as instructed by the pattern you are using. This will be the first round until you reach the stitch marker again.
Important Tips to Remember When Knitting in the Round
- Be very careful to make sure that your stitches are not twisted
- Use a stitch marker to mark the beginning/end of the round
- As you join the stitches to make the circle pull the working yarn tight to prevent an ugly gap from developing
After several rows of knitting, your work will look something like this, depending of course on the pattern you are using.
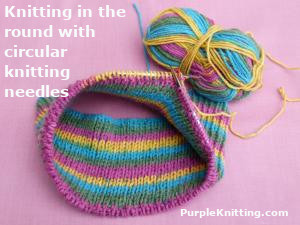
So, as you can see, knitting with circulars is quite easy once you’ve been shown how it is done! Now, the next question might be what project to make using circulars?
How about trying this Simple Double Knit Beanie Hat that is free to use?


")