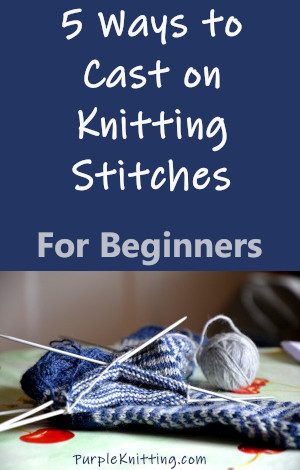
As a beginner learning to knit, one of the first things you’ll need to know is how to cast on knitting stitches to start your project.
In case you don’t know, casting on is a term that knitters use to mean the way by which you add stitches to your needle – that is turning the yarn into stitches on your needle.
Several Ways to Make Stitches
As with many other skills, there are several ways you can add stitches to the needle. Growing up my mother taught me only one method. It is called the cable method of casting on. It was only many years later when I left Africa and came to live in the UK that I discovered the other techniques.
One day I was knitting and a friend happened to be watching me cast on. She was astonished as she had never seen the way I was doing it. I used 2 needles for a start – she could not figure it out as she was familiar with another way where you only used one needle!
Here is a list of the 5 ways I have included
- Knit wise method
- Easier, Looser method of Adding Loops
- Cable cast-on technique
- Long-tail cast on with finger gym
- Long-tail cast on-thumb method
I have put 5 of these techniques together in this post so that new knitters can have a look at each one, try them, and then make a decision as to which one they prefer.
Casting on Knitwise Method &
Easier Looser Adding Loop Method
In the video below that I have embedded from HappyBerry’s Knitting channel, you will see exactly how to add stitches using the knitwise method.
It’s called knitwise because it is done just like you were going to knit a stitch. The only difference is that instead of slipping the stitch off you add the loop created to the left-hand needle.
If you are a beginner you might find it quite awkward to begin with but practice makes perfect. Take it slowly, to begin with -replay the video over and over til you get the idea. Use chunky yarn and thick bamboo needles as she is doing in the tutorial as these will make it a little easier when you are a beginner.
Toward the end of the video, you will see she suggests a second easier method. In this one, you merely loop the stitches on. It is easier, but the end result will not be as neat. This method as she suggests is much looser.
If you can persevere with the knitwise method it will pay dividends when you start knitting your first row – as the techniques are very similar. Master the knitwise method which uses 2 needles and you are going to pick up the knit stitch very easily.
In the video, you will also notice that once the slip knot is made, the stitches are added using the end of the yarn that is attached to the ball – just as if you were knitting and it’s done with 2 needles – again just like knitting!
Adding Knitting Stitches with Cable Technique
This technique is very similar to the knitwise method demonstrated in the video from HappyBerry Knitting above, but I prefer it as it’s neater, and is more stretchy. Having an elastic type of cast-on is beneficial because it means there is more give in the project.
This would be useful in things like sleeves when knitting a sweater, in the ribbing for the front and back of garments and in many other projects too.
Knit wise vs Cable Cast On?
As you studied this video did you see that this cable method is very similar to the knit-wise method above?
The only difference is that in the cable cast on you put your right-hand needle between one stitch and next on the left-hand needle and create a new stitch. Whereas in the knitwise method that new stitch is made by putting the right-hand needle into the stitch – not between them.
I always add stitches to a new project using this cable cast-on method. It is what I was taught long ago and I never knew about any others til recently. I recommend it for the reason that it’s neat and will prepare you for the knit stitch technique to come.
Long Tail Cast On – Finger Gym
In the next 2 ways to add stitches, you again make a slip knot but the difference is that this time the end of the yarn that is not attached to the ball is used to make the stitches. These methods are referred to as long-tail cast-on techniques
To learn the first long tail technique watch this video tutorial from Sheep & Stitch. It looks complicated but with practice, you will get the hang of it. Watch carefully and do each step as she does them.
This technique involves doing a bit of gym with your fingers but as always you can perfect it with practice.
How Much Yarn for Long Tail Cast On?
Did you notice that it’s important to figure out how much yarn you need to leave to add on your stitches – get it right so that you don’t run out of wool before you’ve added all your stitches.
Before making the slip knot wind the yarn around the needle as many times as you need stitches for, then add a bit extra – 4 inches or so just to be safe – then make your slip knot.
Once you have made the slip knot push it through the needle so that the long tail end is at the front of the work/needle facing you. The yarn attached to the ball is at the back of the work/needle.
- Needle with slip knot stitch in right-hand
- Clamp down on 2 yarn threads with two fingers of the left hand
- Use thumb and forefinger to separate and push open the two threads ( long tail and one to yarn ball)
- Right hand forefinger pressing on slip knot stitch to hold it firmly while holding knitting needles
- Twist and move the left hand to the left to expose the diamond shape made by the thread in the fingers
- Take the needle ( in right hand) and touch it to the thumb of the left hand, move it through the loop around the thumb
- Move left hand to front, move through the second loop, and pull yarn through the original loop and pull down to make a stitch!
Cast on Thumb Method
This method also uses a long tail method but instead of using your fingers as in the previous method, you use your thumb.
- Hold the slip knot firmly with your forefinger on your right hand – or thumb and forefinger – whichever is more comfortable.
- With your left hand grab the yarn placing your hand behind the yarn – close your fingers over it much as you would if you were making a thumbs-up gesture
- Take your thumb and move it behind the yarn to hook it up around your thumb
- With the needle on the right hand put the point of the needle onto the front of the thumb and into a loop of yarn around the thumb
- Take yarn from the ball and wrap it around the needle – from the back to the front
- Take the loop on your thumb and move it over the needle and drop it on there
- Pull on the long tail yarn end to tighten up the stitches on the needle.
So, there you have it – 5 ways you can use to add stitches for your next knitting project. Choose one and practice adding stitches til you feel totally comfortable and can do it without thinking!
The next step will be to learn how to do the knit stitch and the garter pattern which you can find instructions for HERE


