One of the questions every knitter asks at some point is: “What do I do when I run out of yarn?” Or maybe you’ve seen a project with beautiful stripes and thought: “How do I change colours in knitting ?”
The good news is that switching colours or joining in a new ball of yarn isn’t nearly as difficult as it sounds. With a few simple techniques, you’ll be able to create smooth joins that look neat and professional.
The method you use may need to change depending on the situation and the type of yarn you are using.
When Do You Need to Join a New Yarn?
- When you want to add a new colour (when knitting stripes or blocks).
- When you run out of yarn.
Whatever the reason, the method you choose depends on your yarn type and the finish you’d like.
5 Easy Ways to Join Yarn
1. The Simple Knot (Quick Fix)
This is the easiest option, just tie the old yarn to the new yarn with a small knot at the beginning of a row.
It’s quick and easy, but it can leave a visible bump and isn’t ideal for areas that will show. You can get away with this method if you make the knot appear where a seam will be or in an area where it will not be seen on the finished project.
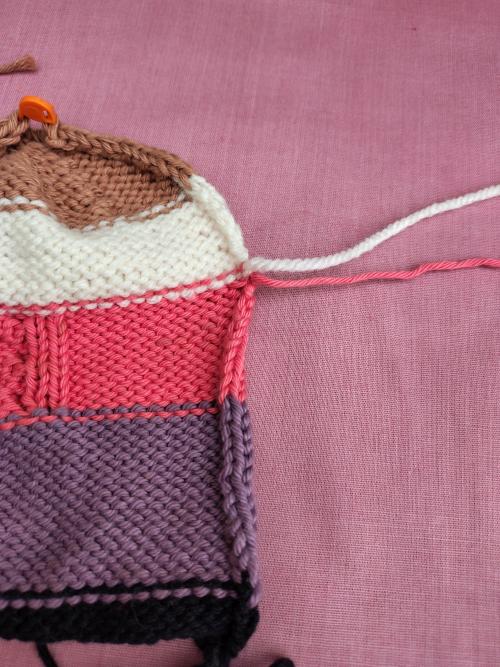
You’ll see with this project – image above ( a cosy comfort Izzy doll ) I joined the new colour with a knot close to the beginning of the row as I knew that it would be seamed there and so would not be visible.
If you are worried about a bump showing from the knot then another method is to unpick the knot, on the next row, and weave in the ends using a blunt-end large-eyed tapestry needle.
2. Pick up New Yarn and Knit
You can also just pick up the new yarn at the start of the row and knit with it. Leave enough of both the old and new yarn so you can weave in the ends later. This method can also be used when you have to change colour in the middle of a row and do not want a knot there.
3. The Overlap or Double Stitch Method (Beginner Friendly)
Knit a few stitches with both the old and new yarns held together. After knitting a few stitches, you drop the old yarn, and continue with the new only. Later, weave in the tails on the back of your work. This method is strong, easy, and works well when you want to add a new ball of the same colour. It is a way of adding in the new ball securely without the need for a knot.
If you are joining in a new colour, say when you are creating a striped design, then it would be best to do the overlap on the first stitch of the row, where the colour change is not so visible.
Remember when you get to the double-stranded stitch that you work it as one strand.
4. The Russian Join (Invisible Finish)
This one feels like knitting magic! Using a tapestry needle, you weave each yarn end back into itself, then pull them together. The join is strong, smooth, and nearly invisible—no ends left to weave in.
After watching the tutorial of this method, you can understand why it is good way of joining when you are using stranded yarn. Any yarn that is not twisted will not work with this method – eg single ply or unspun roving yarns.
5. The Felted Join (Spit-Splice)
This method works well for wool and other animal fibres. You fray the ends, dampen them slightly (traditionally with spit, but water works too), and rub them together between your palms until the fibers mesh. The result: one continuous strand with no tails.
Tips When Changing Colours in Knitting
When working stripes or colour changes:
- Change at the beginning of a row if possible, as it keeps the transition tidy.
- Carry yarn up the side if you’re alternating colours every few rows. Twist the yarns at the edge to avoid holes.
- Keep tension even so you don’t end up with loose or stretched stitches.
Don’t Forget to Weave in the Ends
Even the neatest join usually leaves small tails. Take time to weave them into the back of your fabric with a tapestry needle. This prevents unravelling and keeps your work looking professional.
- Weave into the purl bumps on the wrong side.
- Change direction once or twice for extra security.
- Trim carefully so the tail doesn’t poke through.
Tips for Success
- Always leave a tail about 6 – 8 inches long, you’ll thank yourself later.
- Try out different methods on a practice swatch first.
- Wool yarns are easiest for invisible joins; cotton and acrylic may need extra care.
- There’s no one “correct” way. You need to choose the method that suits your project and yarn.
Final Thoughts
Joining yarn or changing colours is part of every knitter’s journey. Once you’ve practised a few times, it will feel completely natural. Try out each method and see which one works best for you. Use different joins for different projects and yarn types.
See more Learn to Knit tutorials HERE


