Disclosure: This post may contain affiliate links for products recommended. If you click a link and buy something I may receive some compensation, but this is at no cost to the reader. Thank you for visiting this website.
While searching for an Easter knitting project that I can make for my niece’s two young sons I came across this free knitting pattern for an Easter bunny in an eggshell.
Every year when Easter comes around I like to make “a little extra something” to go with the chocolate.
Get the Free Pattern
Cheryx the designer of this pattern has very kindly made it free to use.
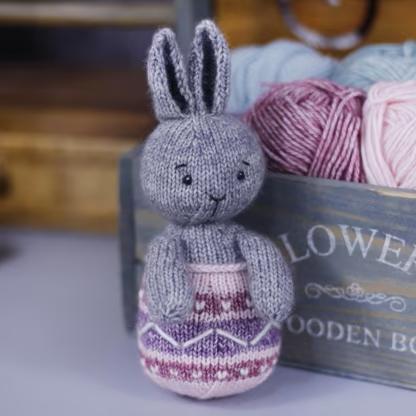
Just click the image to download the pattern.
I like the design on the eggshell and although it looks quite complex it is not when you follow the detailed instructions that Cheryx has provided. She has also added some step-by-step photos to make this project easier to do. I noticed that it is all knitted flat, and then seamed up to make the figure and shell.
What Yarn is Needed?
Cheryx has used a sport weight yarn which is somewhere between 4-ply and double knitting yarn. I plan on using double knitting Paintbox Cotton yarn that I already have but I’ll alter the knitting needles size to 4mm.
The instructions state that the tension is not too important as you are not going to make a fitted garment. I do know though that you should use a slightly smaller needle when you make items that are going to be stuffed with toy filling. Why? This is so that when the knitted fabric is stretched you don’t notice the white filling between the stitches.
Cheryx has used the traditional colours of Easter such as mauve, pink and purple but I am going to use something different that will appeal more to my niece’s sons – hopefully.
Needles?
As this is knitted flat you need only to use single-point straight knitting needles. If you use the same yarn as is recommended which is the sport weight yarn then you’ll need 2.5mm needles.
Other Supplies Needed?
- The rabbit is filled so you’ll need some toy filling for that.
- 2 stitch markers,
- a large-eyed blunt-end tapestry needle
- scissors
- sewing pins
Knitting Skills Needed
The skill level you need to make this rabbit has been set at beginner level. The stitches that are used in the instructions are as follows –
- to knit and to purl stitches
- increasing via a knitting into the front and back of a stitch
- increasing using the kll method ie knit into left loop
- decreasing by knitting 2 stitches together k2tog
The one method that might be less well known is the increasing technique where you knit into the left loop. Watch the video below to see how it is done.
Finally what I like about this pattern is all the details and photos that Cheryx has given in her instructions that show you exactly how to put the head and body of the rabbit together.
See More Easter Knitting Projects HERE


