Disclosure: This post may contain affiliate links for products recommended. This means that if you click a link and buy something I may receive some compensation, but this is at no cost to you the reader. Thank you for visiting this website.

In this post, you’ll discover, as I did, how to make a knitted scrunchie using straight single point needles. This project is ideal for a beginner who has just learned how to knit and is familiar with the basic knitting stitches such as the knit and purl and how to cast on and off. These hair accessories are loved by many. There’s no limit to how many you can have. They’re the perfect handmade gift for friends and family too. I use them everyday so wanted to figure out how to make my own.
Time and Project Difficulty?
I found this to be a quick project that can be picked up whenever you have spare time such as in the evenings while watching the television. It does not require any concentration so is perfect when you have family around.
It is an easy project too as you only need to know how to cast on, and off, how to do the knit and purl stitches. It’s so ideal for a first project for beginners!
Instructions
The instructions from the free pattern ( click the image or link ) will tell you how many stitches to cast on, and how many rows to make of the stockinette stitch (one row knit and one-row purl)
However it does not give instructions on how to do the mattress stitch which is required to join the short sides of the project together. I have included a video below that demonstrates how to do this step.
Supplies Needed?
Download the free pattern HERE
Double Knitting Yarn by Paintbox or similar
You’ll need a pair of 3.5mm (US 4) Single Pointed Straight Knitting Needles if you’re using the double knit weight of yarn.
Step by Step Instructions
The pattern gives instructions on the steps to make these hair bands. Click the link above – under Supplies Needed to download the pattern.
Basically, you will be knitting a rectangle in stockinette stitch, then joining the short sides together to make a circle. After that, the elastic is inserted and you seam the long sides of the rectangle together to complete the project.
Tips Challenges & Overall Experiences
This was an easy satisfying project that is perfect for those who have just learned to do the basics of knitting. It does not take long to do so you get the quick satisfaction of making something with your new skills. I plan to experiment with this design using larger needles and thicker yarn and adding on more stitches to make it a bit more gathered and frilly.
Summary
To summarize then this is a perfect project for a new knitter to do. It only needs knowledge of the knit and purl stitches and how to join knitting using the mattress stitch method.
It is a quick project that can be done in a few hours. This means you get to see the results of all the skills you’ve mastered which is really rewarding. At the end of the project, you have a useful item, or to give away as a gift. Also, you can use up odd bits of leftover yarn.
My Project
I have included below a few photos of each of the stages in my project that will hopefully show how easy it is make these items.

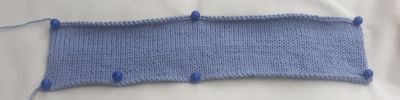
The image above shows that I have cast on the required stitches and knitted several rows of the stockinette stitch.
This image shows the project once I had finished the knitting part – essentially a knitted rectangle.
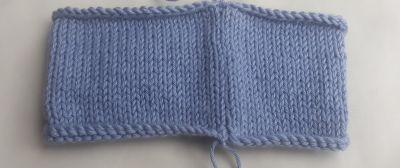
This photo shows how it looked once I had joined the short ends of the rectangle with the mattress stitch technique.

Here is how it looks once you turn the knitting to the wrong side and put the elastic band around it.
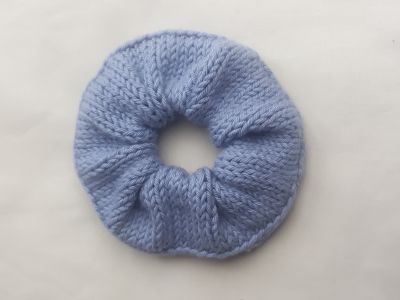
After placing the elastic band, you then sew the long ends together to complete the project.